

|

|
Customizing Your Desktop
Your Desktop is your home page in Apptricity Version 7 applications. You can add “mini” applications called SmartPins, have multiple Desktops, and customize your Desktop to display the information you need at-a-glance.
When you first log on to the application, your Desktop is blank unless your organization has configured one for general use.
From your Desktop, you can:
View your Desktop from Any Panel
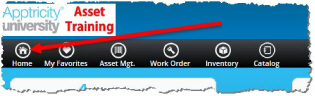
The Home button always displays in your menu bar, the horizontal black band that runs across the top of your Desktop. You can click the Home button on any page to display your default Desktop.
Create a New Desktop
When you first log on to your Desktop, you can customize it to display the items you want to see when you first log on. Your Desktop is private and cannot be viewed by other users, unless you share it.
You can create as many Desktops as you like. If you have more than one Desktop, the one currently displayed has a check mark next to its name in the Home menu.
When you create a new Desktop, you must be on your Homepage or you cannot see the push pin to display the SmartPin menu.
To add a new Desktop:
-
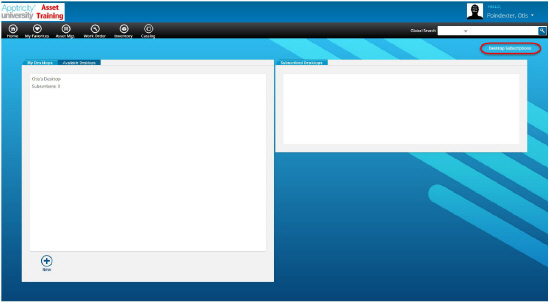
Click Home → More to display the Desktop Subscriptions panel. The Desktop Subscriptions panel is displayed.
-
Click New to display the Add New Desktop box.
-
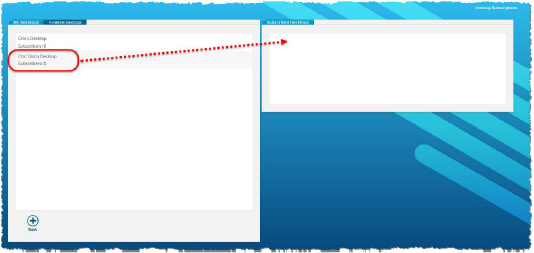
Type a name for your Desktop, and then click Continue. The name of your new Desktop is displayed on the left pane, under the My Desktops tab.
-
Drag the new Desktop and drop it in the Subscribed Desktops list on the pane to the right. The Desktop displayed at the top of your Subscribed Desktops list is your default Desktop. You can change your default Desktop at any time by dragging it to the top of the Subscribed Desktops list.
Add SmartPins to Your Desktop
SmartPins are mini-applications that you can add to your Desktop so you can easily access tasks and view information. For more information about SmartPins, please see Apptricity SmartPins.
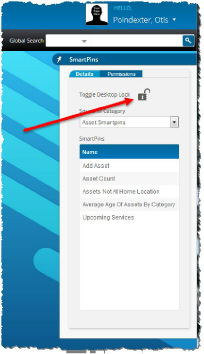
On the right side of your Desktop is an icon that resembles a push pin. This icon is the Pin button. Click it to display the SmartPins Menu. You simply drag the SmartPin from the list, and then drop it on your Desktop. The information for the SmartPin is immediately updated for your User ID so you can begin using the SmartPin.
To add a SmartPin to your Desktop:
-
Click the Pin icon on the right side of your Desktop to display the SmartPins
slide-out menu.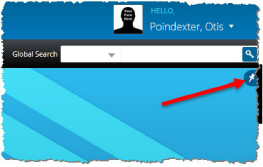
-
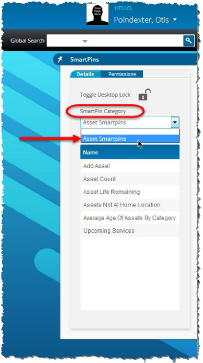
Select the category from the SmartPin Category list, if your organization uses SmartPin categories. We will choose “Asset SmartPins.”
-
Drag the SmartPin you want to use, and then drop it on your Desktop.
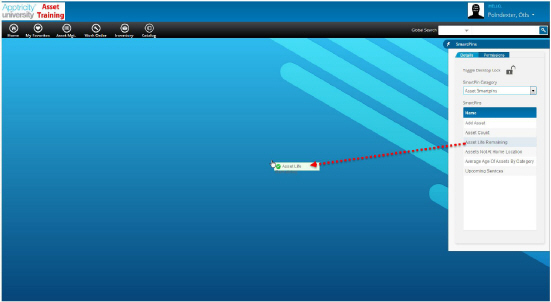
The SmartPin drops into place, following an underlying grid on the Desktop. As long as the SmartPins menu remains open, your SmartPin can be dragged to any location on the Desktop.
-
To lock your SmartPins into position, click the Toggle Desktop Lock padlock to close the menu.
Common SmartPins of Version 7 Applications
Some SmartPins are available in all Apptricity applications. The following section displays the common SmartPins and a description of their functions:
Notifications
The Notifications SmartPin displays a list of items that require your attention. If you have reports to approve, they are displayed here.
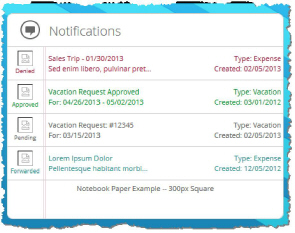
You can click the item in your list, and the appropriate panel for completing the action is displayed.
Calendar
The Calendar SmartPin displays the current day of the week, month, date, and year

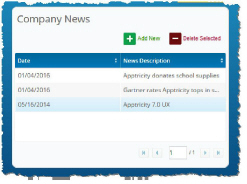
Company News
This SmartPin displays any news that your organization wants to display to everyone.
Links
The Links SmartPin enables you to add external links to your Desktop. When a link is clicked, a new browser window opens and you are taken to that web site.
This SmartPin has three types of links that can be added:
-
Corporate
-
Personal
-
Media
To add a link:
-
Click the Personal Links or the Media Links tab on the Links SmartPin where you want to add a link (or the Corporate Links tab, if allowed).
-
Click Add New to display the URL field.
-
Type a Description of the link, type or paste the web address in the URL field, and then select HTML as the Document type. Finally, click Save.
Trash
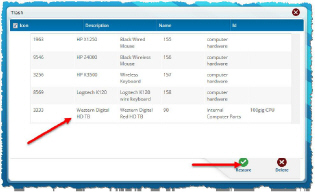
The Trash SmartPin displays a list of items that you deleted. You can restore an item to its original location from the Trash, or you can delete it permanently.
To restore a record from the Trash:
-
Double-click the Trash SmartPin to open it.
-
Select the record you want to restore.
-
Click Restore to move the record back to its original location.
To permanently delete a record from the Trash.
-
Double-click the Trash SmartPin to open it.
-
Select the record you want to permanently delete.
-
Click Delete to display the Confirm Delete box.
-
Click Yes.
Application-Specific SmartPins
Application-specific SmartPins are used on in only one application. These SmartPins give you information or access to functions specific to the application you are using.
We will discuss the Asset-specific SmartPins in this section.

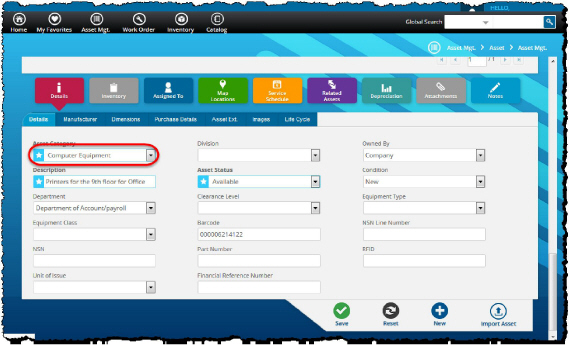
Add Asset
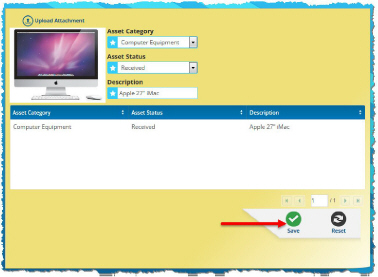
The Add Asset SmartPin enables you to add a new asset. You can also upload an image of the asset with this SmartPin.
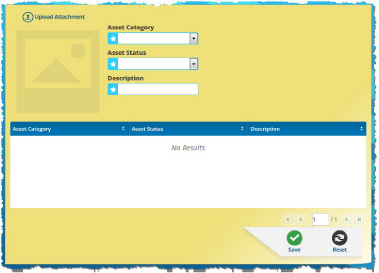
To add an asset:
-
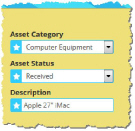
Select the category from the Asset Category list, select the current status of the asset from the Asset Status list, and type a description of the asset in the Description field. All three fields are required.
-
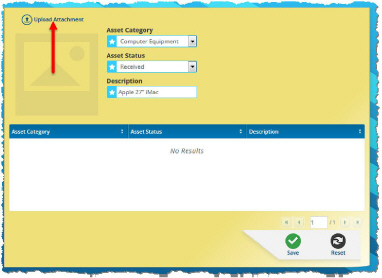
Click Upload Attachment to add an image of the asset.
-
In the resulting File Upload box, select the image.
-
Click Open to upload. The asset image is added.
-
Click Save.
Asset Count
The Asset Count SmartPin displays the number of assets by asset category, giving you quick insight into a particular inventory.
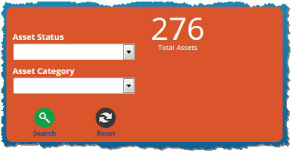
As assets are added into the database, the Asset Count SmartPin keeps count. Unless specified in the Asset Status and/or the Asset Category fields, the number reflects the total number of assets.
To get specific asset counts:
-
Select the status from the Asset Status list, and/or a category from the Asset Category list.
-
Click Search. The assets matching the status and category you selected are displayed.
-
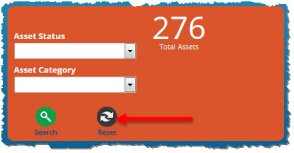
Click Reset to return to the total asset count.
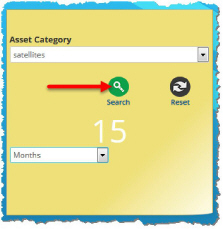
Average Age of Assets by Category
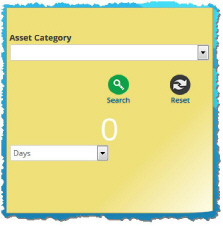
This SmartPin displays the average age in days, months, or years for every asset in the Asset Category, depending upon what you select. An asset’s age is calculated by subtracting the current date from the asset purchase date.
To view the average age of assets by category:
-
Select the category to view from the Asset Category list. (See below.)
-
Select Days, Months, or Years from the drop-down menu. (See below.)
-
Click Search to display the average age of the assets in the category you selected.
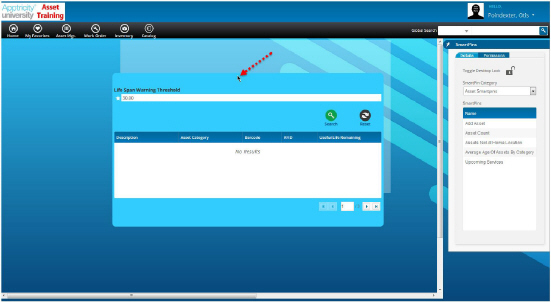
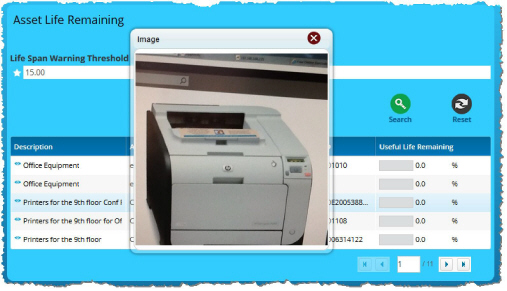
Asset Life Remaining
This SmartPin displays a list of assets that have useful life remaining less than or equal to a given threshold value. This value is determined by your organization, based on manufacturer recommendations.
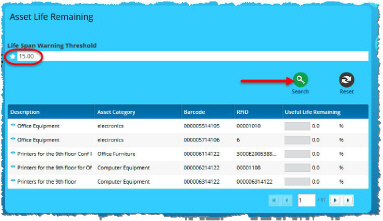
The list displays the following:
-
Description
-
Asset Category
-
Barcode
-
RFID information
-
Useful Life Remaining (percentage)
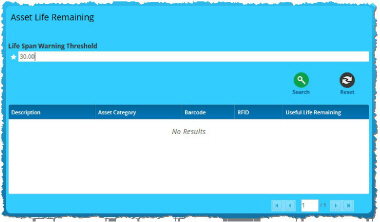
To view the Life Span Warning Threshold for a specific asset:
-
Enter a time period in days in the starred, required field. (The default setting is 30 days in the base version of Asset, but this figure can be specified by your administrator.)
-
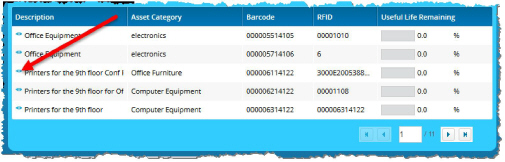
Click Search to display the list of assets nearing the life span warning.
-
Click the blue eyeball to the left of the asset name to view an image of it.
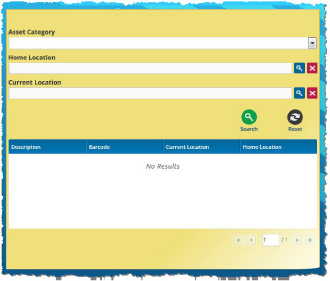
Assets Not at Home Location
The Assets Not at Home Location SmartPin displays a list of assets that have been relocated. The list of assets provides the following information:
-
Asset description
-
Barcode
-
Home location
-
Current location
To view assets not at their home location:
-
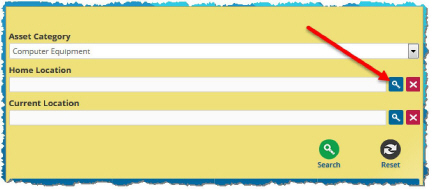
Select the category from the Asset Category list.
-
Click Search in the Home Location field to display the Home Location - Search pane.
-
Fill in the search fields, or leave them blank for a non-filtered search, and then click Search.
-
Click to select a home location from the list of results. The Home Location - Search window closes and the location you selected is displayed in the Home Location field.
-
Click Search to deliver a list of assets based on your criteria.
-
Click an asset in the search results list to display the Asset Mgt. page for your selected asset.
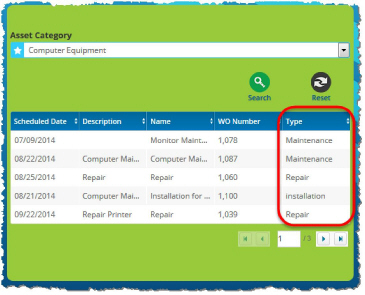
Upcoming Services
The Upcoming Services SmartPin displays a list of upcoming Work Orders for a specific Asset Category.
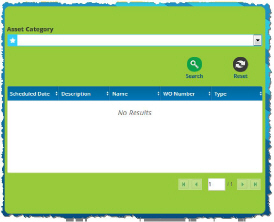
The information displayed by this SmartPin includes:
-
Date of the scheduled service
-
Description of the service
-
Work Order number
-
Work Order type
To view upcoming services for an asset category:
-
Select the category from the Asset Category.
-
Click Search to display the services scheduled for the category you selected.
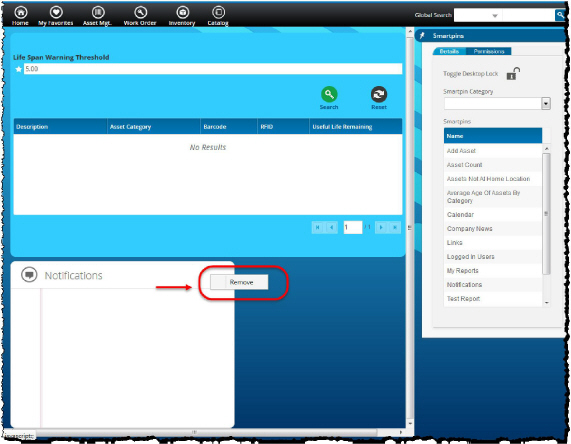
Remove SmartPins from Your Desktop
If you have accidentally added a SmartPin to your Desktop, or you want to remove one because you no longer need it, you can remove it. You cannot remove SmartPins from a Desktop that you do not own.
You must have the SmartPin menu displayed to remove a SmartPin. To remove a SmartPin from your Desktop:
-
Right-click in the upper right-hand corner of the SmartPin to display the Remove menu.
-
Click Remove. The SmartPin is removed from your Desktop and is displayed in the SmartPins menu.
Make your Desktop Public
Your System Administrator is responsible for setting your Desktop so that others can view it. Please follow the process your company has in place for requesting that your Desktop be made public. (For more information, please see the Apptricity Asset Application Administrator Guide.)
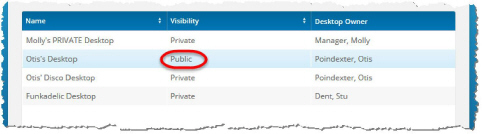
Subscribe to a Public Desktop
You can subscribe to any Desktop that your administrator has made public.
To subscribe to a public Desktop:
-
Click Home → More. The Desktops Subscriptions panel is displayed.
-
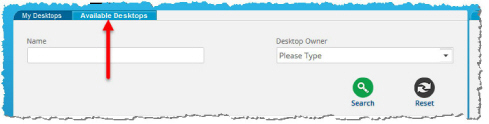
Click the Available Desktops tab on the pane to the left.
-
Enter the name of the Desktop in the Name field and enter the Desktop Owner if you are searching for a known one, or leave the fields blank for a non-filtered search.
-
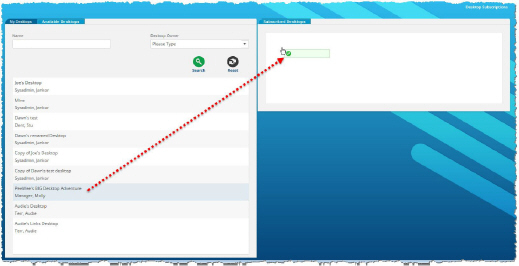
Click Search. A list of results matching your criteria is displayed in the pane below.
-
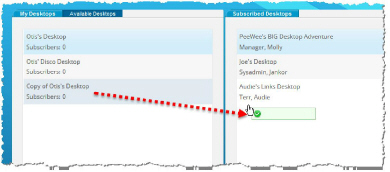
Click and drag the Desktop you want to subscribe to, and then drop it in the Subscribed Desktops list on the pane to the right. Repeat as necessary.
If you add more than one, the Desktop displayed at the top of the list is the default Desktop you see when you either first log in to the application, or when you click the Home button in the menu bar.

Copy a Desktop
If you have created a Desktop and you want another one very similar to it, you can clone the existing Desktop. You can then customize the new Desktop.
To copy a Desktop:
-
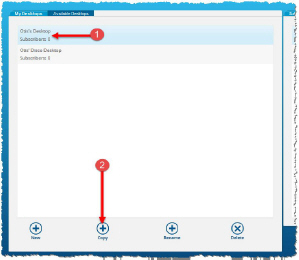
Click Home → More to display the My Desktops panel.
-
Select the Desktop to copy from under the My Desktops tab on the left pane (1), and then click Copy (2).
-
Name the copy in the resulting Add New Desktop box, or use the default name (“Copy of XX”) assigned.
-
Click Continue to add the Desktop to the My Desktops list.
-
As before, click and drag the Desktop you copied to the Subscribed Desktops list on the pane to the right.